

DIY
DIY is a fine NZ tradition that should be encouraged! If you want more information about how Heatwell does things, or would like to learn how to install underfloor heating yourself, then scroll on down!
DIY covers:
Underfloor heating measurement App
Install and instruction videos
Under-tile heating FAQ
Under-carpet heating FAQ
Under-wood / Under-vinyl heating FAQ
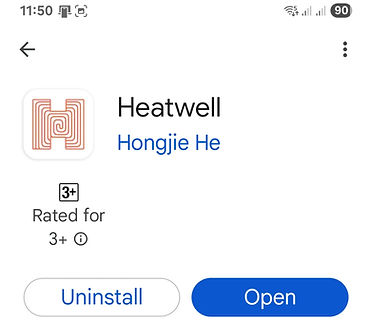
Floor Measuring App
Heatwell has developed a measurement app that allows professionals and DIY users to determine the area underfloor heating needs to cover and what size cable (in Watts) is needed for installation.
The App is a great tool and is free!
How to use the App
Step 1: Finding the floor Area
All areas should be entered in meters
The area(s) in blue are positive values. Area 1 should be the width and length of the total area you want to heat.
If the area you want to heat is an odd shape you should break up the area into squares / rectangles
If you need to add additional space please press the "Add" button
The areas is red are used to reduce the size of the heated area.
There are four different possible reductions. Heating is not required under anything fixed to the floor. Heating can be in a shower, however, this is personal preference. Please allow for heating under hanging vanities.
Leave the blue values as zero if they do not apply.
Press "Clear" to start again, or press "Next Step" to continue
Step 2: Finding the size of heating cable required for the area
The square meters of the area to be heated should already be displayed
The cable size (in Watts) should also be displayed.
The default setting is for a tiled floor. If you want to install carpet or vinyl please press the "Carpet" button
Both the "Purchase Cables" and "Get More Info" buttons are linked to the Heatwell Website.
Press the button at the bottom if you want to get an idea on energy useage.
Step 3: Determining Energy Use
This section is indicative only, and will not be an exact measure of energy use
The Cable Watts has already been determined
Adjust the hours to how long you are likely to use the underfloor heating
Adjust the cost per kWatt to reflect what your utilities power bill has indicated. The cost needs to be in cents.
Download the Heatwell Calculator App for free at your Apple or Google Store


Installation Videos
Heatwell has made some videos to show our clients or those of you interested in DIY our underfloor heating install process. Please take special notice of our BEST PRACTICE video. Heatwell adheres to our Best Practice method while installing. The DIY installer will need to follow our Best Practice guidelines for product guarantees to apply.
All videos, including thermostat videos, are available on the Heatwell Youtube channel

Best Practice Installation Video
Creating the layout for underfloor cable install
Please check out our free measurement app. Find the size of cable you need with ease!
Installing the Underfloor Cable
Draw wire for cold tails (Gib installed)
Draw wire for cold tails (No Gib on wall)
Flush box for the Thermostat
Under Tile Installation FAQ

What method of underfloor heating does Heatwell use?
Heatwell uses our exclusive Pro Series heating element. The Pro Series cable is attached to the floor, a fiberglass mat is placed over the top, a self-levelling compound or screed is poured over the top. The result is a heating element that is encased and protected. The Tiler will love the flat level surface. Heatwell specialises in electrical underfloor heating systems.
How long does the self-levelling compound (screed) take to dry?
Please allow 24 hours. In cold conditions, drying could take more than 24 hours. Tiling or waterproofing should not be done if the floor is not fully dry.
When is the underfloor heating installed?
Underfloor heating is usually done just before the tiler. The walls should be lined. All gib stopping and sanding should be complete. All painting should be done.
Is underfloor heating installed before or after waterproofing?
We can do either. There will be no effect to the electrical element or our 25-year guarantee. However, it is preferable that waterproofing is done after underfloor heating is installed.
Can underfloor heating be installed over the top of any type of floor?
Underfloor heating can be installed directly over concrete as long as there are no cracks, holes, or sharp protrusions.
Installation over the top of particle board or plywood however is not recommended. Expansion and contraction of particle board or plywood is a certainty in NZ’s conditions, Expansion and contraction risks cutting the electrical element where the flooring butts together.
How should particle board or plywood be prepped?
There are three excellent options. The most common is laying tile and slate underlay.
Another option is to lay 6mm insulation sheeting. Infinity from Tile Max is an example. Insulation sheeting has the big advantage of improving the efficiency of the underfloor heating and will save you money in the long run.
The third option is to incorporate an anti-fracture rubber-based system into your waterproofing. Strata Flex from Surtec is an example. This option is probably the most expensive, however, it adds the least to the floor height.
Can underfloor heating be installed over existing tiles?
Yes. However, no tile can be loose or broken. The tile surface will need to be primed before underfloor heating is installed. Mapei Ecoprime is an example. You are adding significant height to the floor. We would prefer that the old tiles are removed.
What condition does the floor need to be prior to the underfloor heating installation?
All floors need to be clean, free of dust, and free of paint. They also need to be free of any cracks, holes or sharp protrusions.
A floor that is being renovated needs to have all the remains of the previous flooring removed. Including glue and old tile adhesive.
Is there any wall prep required?
Yes. We need to mount the thermostat / controller. The cold tails that are attached to both ends of the heating element must come up from the floor to the thermostat flush box. 25mm holes need to be drilled through the wall nogs. A 50mm wide and 25mm deep section must be checked out of the bottom plate of the wall. A draw wire from the thermostat flush box down to the bottom plate is essential. The flush box for the thermostat can be installed either vertically or horizontally. Heatwell has thermostat options for both.
What does the Electrician need to know?
A 900W element draws 3.91amps and is 58.78ohms in total. Any heating element 1000W or above needs a dedicated RCD circuit breaker back to the board. All our thermostats have a 15amp maximum capacity. We allow 150-180W per m2 under tile.
What does the Tiler need to know?
Please don’t drop anything sharp or heavy on the screeded surface. Cutting of tiles should not be done on the screeded surface.
If any holes are to be drilled into the floor, we need to know about it before we lay the underfloor heating! Drilling a hole in the heating element will mean the whole flooring process will need to start again. Please use a two-pot flexible tile adhesive and a latex grout.
Under Carpet Installation FAQ

What method of underfloor heating does Heatwell use?
Heatwell uses our exclusive Pro Series heating element. The Pro Series cable is attached to the floor, a fiberglass mat is placed over the top, a self-levelling compound or screed is poured over the top. The result is a heating element that is encased and protected. Heatwell specialises in electrical underfloor heating systems.
How long does the self-levelling compound (screed) take to dry?
Please allow 24 hours. In cold conditions, drying could take more than 24 hours.
When is the under-carpet heating installed?
Underfloor heating under carpet is done just before the carpet is laid. All painting and other prep work should already be complete.
Can any type of carpet or underlay be used?
Unfortunately, not. You must be very careful of the thermal factor of your carpet and underlay. With products like thick wool carpet, there is a natural level of insulation that does not work well with under-carpet heating. Some types of underlay are designed with insulation in mind. Please ask your carpet specialist if your choice of carpet will suit under-carpet heating.
Can under-carpet heating be installed over the top of any type of floor?
Underfloor heating can be installed directly over concrete as long as there are no cracks, holes, or sharp protrusions.
Installation over the top of particle board or plywood however is not recommended. Expansion and contraction of particle board or plywood is a certainty in NZ’s conditions, Expansion and contraction risks cutting the electrical element where the flooring butts together.
How should particle board or plywood be prepped?
There are three excellent options. The most common is laying tile and slate underlay.
Another option is to lay 6mm insulation sheeting. Infinity from Tile Max is an example. Insulation sheeting has the big advantage of improving the efficiency of the underfloor heating and will save you money in the long run.
The third option is to incorporate an anti-fracture rubber-based system. Strata Flex from Surtec is an example. This option is probably the most expensive, however, it adds the least to the floor height.
What condition does the floor need to be prior to the under-carpet heating installation?
All floors need to be clean, free of dust, and free of paint. They also need to be free of any cracks, holes or sharp protrusions.
A floor that is being renovated needs to have all the remains of the previous flooring removed. Including glue from fixing down carpet or underlay.
Is there any wall prep required?
Yes. We need to mount the thermostat / controller. The cold tails that are attached to both ends of the heating element must come up from the floor to the thermostat flush box. 25mm holes need to be drilled through the wall nogs. A 50mm wide and 25mm deep section must be checked out of the bottom plate of the wall. A draw wire from the thermostat flush box down to the bottom plate is essential. The flush box for the thermostat can be installed either vertically or horizontally. Heatwell has thermostat options for both.
What does the Electrician need to know?
A 900W element draws 3.91amps and is 58.78ohms in total. Any heating element 1000W or above needs a dedicated RCD circuit breaker back to the board. All our thermostats have a 15amp maximum capacity. We allow 100W per m2 for under-carpet heating.
What does the Carpet Layer need to know?
Please don’t drop anything sharp or heavy on the screeded surface. Be very careful of your carpet gripper! Where the floor heating goes up the wall to the thermostat is the danger point. Putting a nail through the cable will ruin everyone’s day!
Under Wood and Vinyl Installation FAQ

Can underfloor heating we used under any wooden floor?
Unfortunately, not. Heating under natural timber is not recommended. Natural timber will warp and twist if not fixed directly to the floor joists. Nails and underfloor heating are not a good combination! Underfloor heating cannot be installed under existing wooden floors without significant cost.
Are there options if we want a natural wood flooring finish?
Yes. Happily, most wooden floors now are a machined wood or a wood composite. They do need to be the clip together style. The floor will expand and contract. If the machined wood or wood composite is not clipped together then you will develop gaps between planks. You do need to be careful that there is no insultation attached to the machined or composite wood. Ask your flooring supplier if your choice is suitable for underfloor heating.
Can underfloor heating be installed under Vinyl or Lino?
Yes. In fact, vinyl or lino over underfloor heating is a very efficient form of heating. The vinyl or lino cannot be plank style unless it has been specially designed not to expand or contract. Once again, gaps will form with the plank style vinyl.
What method of under-floor heating does Heatwell use?
Heatwell uses our exclusive Pro Series heating element. The Pro Series cable is attached to the floor, a fiberglass mat is placed over the top, a self-levelling compound or screed is poured over the top. The result is a heating element that is encased and protected from heavy furniture. We do not use a mat style system. We have found that heavy furniture can damage the heating element wire with a mat system.
How long does the self-levelling compound (screed) take to dry?
Please allow 24 hours. In cold conditions, drying could take more than 24 hours.
When is the under machined wood or under vinyl heating installed?
Underfloor heating is done just before the final flooring product is laid. Installation of the final flooring product should not be done until the screed is fully dry.
Can under machined wood or vinyl heating be installed over the top of any type of floor?
Underfloor heating can be installed directly over concrete as long as there are no cracks, holes, or sharp protrusions.
Installation over the top of particle board or plywood however is not recommended. Expansion and contraction of particle board or plywood is a certainty in NZ’s conditions, Expansion and contraction risks cutting the electrical element where the flooring butts together.
How should particle board or plywood be prepped?
There are three excellent options. The most common is laying tile and slate underlay.
Another option is to lay 6mm insulation sheeting. Infinity from Tile Max is an example. Insulation sheeting has the big advantage of improving the efficiency of the underfloor heating and will save you money in the long run. The third option is to incorporate an anti-fracture rubber-based system. Strata Flex from Surtec is an example. This option is probably the most expensive, however, it adds the least to the floor height.
What condition does the floor need to be prior to under machined wood or vinyl heating installation?
All floors need to be clean, free of dust, and free of paint. They also need to be free of any cracks, holes or sharp protrusions.
A floor that is being renovated needs to have all the remains of the previous flooring removed.
Is there any wall prep required?
Yes. We need a flush box for the thermostat / controller. The cold tails that are attached to both ends of the heating element must come up from the floor to the thermostat flush box. 25mm holes need to be drilled through the wall nogs. A 50mm wide and 25mm deep section must be checked out of the bottom plate of the wall. A draw wire from the thermostat flush box down to the bottom plate is essential. The flush box for the thermostat can be installed either vertically or horizontally. Heatwell has thermostat options for both.
What does the Electrician need to know?
A 900W element draws 3.91amps and is 58.78ohms in total. Any heating element 1000W or above needs a dedicated RCD circuit breaker back to the board. All our thermostats have a 15amp maximum capacity. We allow 150W per m2 for under machined wood heating. We allow 100W for under vinyl heating.
What does the final flooring installer need to know?
Please don’t drop anything sharp or heavy on the screeded surface. The installer needs to remember to allow a small gap between the edge of the flooring and the wall to allow for expansion and contraction.